|
Excel Cards Maker software creates multiple business cards using Excel Datasheet
| Publisher: |
TradeLabelSoftware.com |
 |
| Downloads: |
1 |
| Software Type: |
Shareware, 45.00 |
| File Size: |
4.27M |
| OS: |
Windows All |
| Update Date: |
24 February, 2022 |
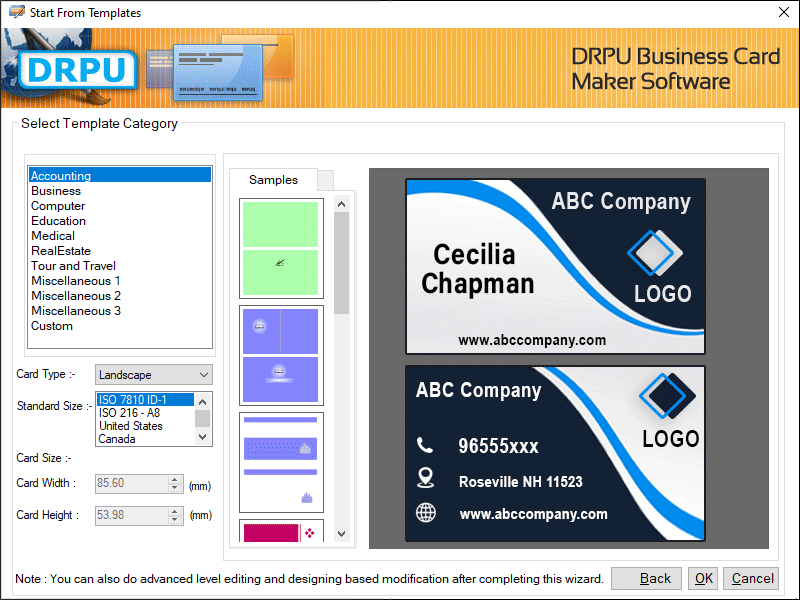
Business Card Creator Tool makes high resolution business cards by choosing different categories of templates such as business, computer, education, medical, real estate, tour and travel etc. Software has basic user interface that helps the novice users to operate it easily without technical expertise. Software allows the user to create a new card or modify the existing one. There are some following steps that help you to create the amazing cards by using business card designer software-
Step 1: Make a new business card by clicking on any one of the three options, Start with Template, Create Card by using Wizard or Create Card with Blank Format.
Step 2: Select the template category, card type, size, dimensions along with the background and colour.
Step 3: Click on User Details option add the various information like name, title, company, address, state, country, phone number, email etc.
Step 4: Double click on the text and set the properties like font, alignment, colour, gradient, border etc.
Step 5: Customize the business card with the help of several designing tools like text, line, signature, library images, picture, barcode, watermark, shapes etc.
Step 6: Make large number of business cards with different barcode and text values with the help of advanced Batch Processing Series option.
1) Make a new text or excel file and add the card information in it.
2) Click on Batch Processing Series option, give a name and import the card details from this text or excel file.
3) Double click on the text which you want to change, set the data source to batch processing series, add the series and click OK button.
Step 7: Export the created card into jpg, gif, tiff, bmp, PDF and other file formats.
Step 8: Choose Send Mail option to mail the designed card to particular email address as per your need.
Step 9: Choose Print option, set all the attributes and then click Print button. To avoid the printing errors, click on Print Preview option and correct the mistakes.
|


